When you pick up a set of fine-tipped colored pencils, you’re setting the stage for something exceptional. It’s not just about filling in spaces; it’s about creating depth and emotion through color. But how do you take that first step toward achieving a professional look? Understanding the right tools and techniques can make all the difference in your artistic journey. Let’s explore what it takes to elevate your coloring game.
Key Takeaways
- Invest in high-quality coloring tools like fine-tipped pens and thicker paper to enhance your coloring experience.
- Familiarize yourself with color theory to understand color relationships and create appealing combinations.
- Practice blending and shading techniques using light pressure and tools like blending stumps for smooth transitions.
- Experiment with different coloring styles to discover your unique artistic voice and preferences.
- Be patient and allow layers to dry before adding more colors to avoid muddy results and achieve depth.
Choosing the Right Coloring Tools
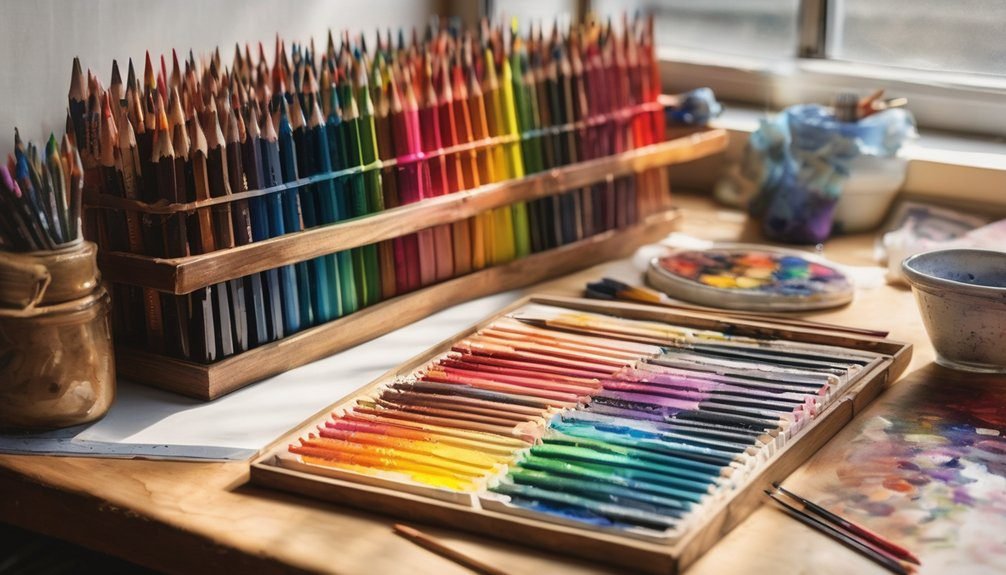
When you dive into coloring, choosing the right tools can make all the difference in your experience and outcome. Start with quality coloring materials like colored pencils, markers, or gel pens. Each offers unique textures and effects, so consider what suits your style best.
Selecting the right coloring tools transforms your experience, enhancing creativity and results in every project.
For detailed work, opt for fine-tipped pens or sharpened colored pencils. If you prefer broader strokes, try larger markers or pastels. Don’t forget about paper; thicker, high-quality paper prevents bleed-through and enhances your colors.
Additionally, gather accessories like erasers, blending tools, and sharpeners to refine your work. Investing in these essential tools will elevate your coloring projects and help you unleash your creativity.

With the right tools in hand, you’re ready to bring your artistic vision to life.
Understanding Color Theory
Color theory is a fundamental concept that can elevate your coloring skills and enhance your artwork. By understanding the color wheel, you’ll learn how colors interact.
Primary colors—red, blue, and yellow—mix to create secondary colors like green, orange, and purple. You can also explore complementary colors, which are opposite each other on the wheel, and create striking contrasts in your pieces.
Analogous colors, found next to each other, provide harmony and balance. Experiment with warm colors, like reds and yellows, to evoke energy, while cool colors, like blues and greens, promote calmness.
Knowing these relationships helps you choose a palette that tells a story and resonates emotionally with your audience. Embrace color theory, and watch your artwork transform!
Techniques for Blending and Shading
Blending and shading can take your coloring to the next level, adding depth and dimension to your artwork.
To start, use a light hand when applying your colors, gradually building up layers for a smoother transition. Try using a blending tool, like a tortillon or a blending stump, to soften edges and create seamless gradients.
Use a gentle touch to layer colors for smooth transitions, and consider blending tools for soft edges and seamless gradients.
You can also blend colors directly on the paper by overlapping them and using circular motions. For shading, identify your light source and apply darker shades where shadows naturally fall.
Experiment with cross-hatching or stippling techniques to add texture. Remember, practice makes perfect, so don’t hesitate to try different methods until you find what works best for you.
Happy coloring!
Exploring Different Coloring Styles
After mastering blending and shading techniques, it’s time to explore the various coloring styles that can elevate your artwork even further.
Each style offers a unique way to express your creativity, so don’t hesitate to try them out.
- Realistic: Focus on details and accurate colors to mimic real-life images.
- Abstract: Break the rules and use colors and shapes to convey emotions or concepts without strict representation.
- Cartoon: Emphasize bold colors and outlines, allowing for playful and exaggerated interpretations of subjects.
Experimenting with these styles can help you discover your artistic voice.
Practicing Patience and Experimentation
When diving into the world of coloring, practicing patience and experimentation can be your greatest allies. Take your time to explore various techniques and color combinations. Don’t rush through your projects; let each layer dry before adding new colors. This will help you avoid muddy results and enhance your overall work.
Here’s a simple approach to guide your practice:
| Technique | Example |
|---|---|
| Layering | Build depth with colors |
| Blending | Use a soft brush for smooth transitions |
| Color Mixing | Combine shades for unique hues |
| Texturing | Experiment with patterns and tools |
Frequently Asked Questions
What Is the Best Paper Type for Coloring?
The best paper type for coloring is smooth, heavyweight paper. It prevents bleeding and allows colors to pop. Look for papers specifically designed for coloring, like marker or mixed media paper, for optimal results.
How Do I Store My Coloring Supplies?
Store your coloring supplies in a cool, dry place. Use containers or organizers to keep everything organized. Make sure to label them for easy access, and regularly check for any supplies that need replacing.
Can I Use Regular Crayons for Detailed Coloring?
While regular crayons might not be the sharpest tools in the shed for detailed coloring, you can definitely use them. Just keep in mind, finer tools may deliver more precision and vibrancy in your artwork.
What Should I Do if I Make a Mistake?
If you make a mistake, don’t worry! Just grab an eraser or a white gel pen to fix it. You can also blend it in with surrounding colors to create a seamless effect. Keep going!
How Often Should I Practice Coloring?
You should practice coloring as often as a kid devours candy! Daily sessions, even if short, will sharpen your skills. Consistency builds confidence, so grab those colors and let your creativity flow whenever you can!
Conclusion
By selecting quality tools, mastering color theory, and experimenting with different techniques, you’re well on your way to coloring like a pro! Remember, patience is key; every stroke you make adds to your artistic journey. Don’t be afraid to try new styles and push your boundaries—your creativity can soar higher than the tallest mountain! Embrace the process, and soon you’ll discover your unique voice in the vibrant world of coloring. Happy coloring!