Transforming your coloring pages into art for your home can be both fulfilling and visually appealing. By choosing the right materials and designs, you can elevate simple coloring into stunning pieces that reflect your personal style. You might be surprised at how different techniques can enhance your work, drawing attention to your creative flair. So, what’s the first step to make your coloring truly stand out? Let’s explore the essentials together.
Key Takeaways
- Choose high-quality coloring materials and thicker paper to enhance the vibrancy of your artwork.
- Select coloring pages that resonate with you and reflect your personal interests or experiences.
- Experiment with techniques like layering and blending to create depth and texture in your artwork.
- Frame your finished pieces creatively to display them prominently in your home.
- Create a gallery wall to showcase your artwork, mixing different sizes and styles for visual interest.
Choosing the Right Coloring Materials
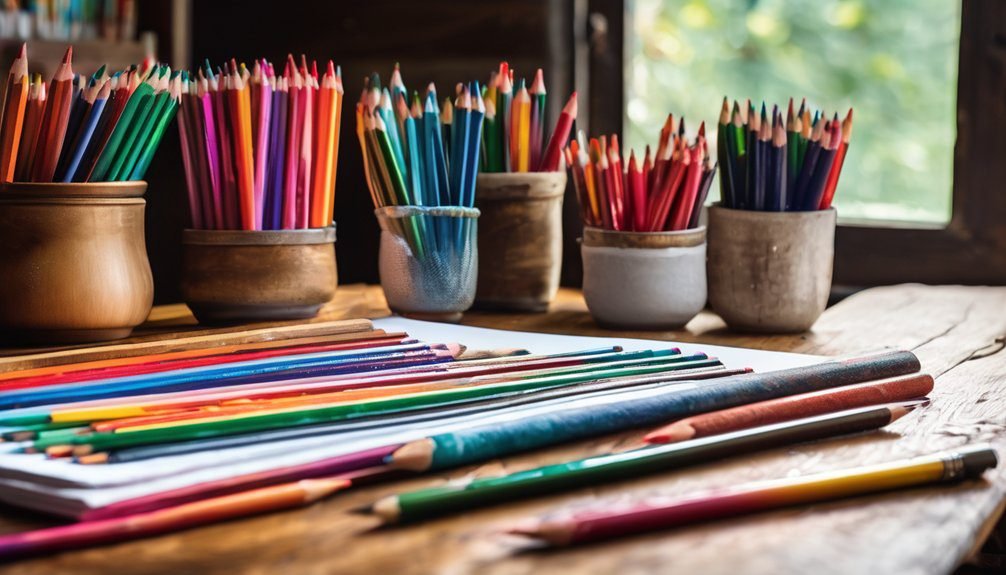
When you’re ready to dive into coloring, choosing the right materials can make all the difference in your artistic journey.
Start with high-quality coloring tools, like colored pencils or markers that offer vibrant hues and smooth application. Test different brands to find what feels comfortable in your hand and suits your style.
Don’t forget about paper; select a thicker stock that can handle various mediums without bleeding through. You might also want to explore specialty papers designed for coloring, as they can enhance your experience.
Lastly, consider accessories like blending stumps or erasers to refine your work.
With the right materials in hand, you’re set to express your creativity and transform simple coloring into stunning art.

Selecting Inspiring Coloring Pages
To truly elevate your coloring experience, selecting inspiring coloring pages is essential. Look for designs that spark joy or resonate with your personal style.
Whether you prefer intricate mandalas, whimsical animals, or beautiful landscapes, let your interests guide you. Dive into online platforms or local bookstores to find a variety of options.
Consider seasonal themes or motivational quotes that uplift your spirit. You might even choose pages that reflect your favorite hobbies or travel destinations.
Remember, the more connected you feel to the artwork, the more enjoyable the coloring process becomes. Once you’ve gathered your favorite pages, you’ll be excited to bring them to life with your unique colors and techniques.
Happy coloring!
Techniques for Enhancing Your Coloring Skills
Enhancing your coloring skills can transform your pages into stunning artworks. Start by choosing the right tools—invest in high-quality colored pencils or markers that blend well.
Practice different techniques like layering colors to create depth; apply lighter shades first, then gradually add darker ones for a richer effect. Experiment with color combinations to develop your unique palette—don’t be afraid to mix and match!
You can also try using a color wheel to understand complementary colors better.
Finally, take your time with each piece. Enjoy the process, and don’t rush; the more you practice, the more your skills will improve. With dedication, you’ll find your coloring evolving into something truly artistic.
Adding Textures and Depth to Your Artwork
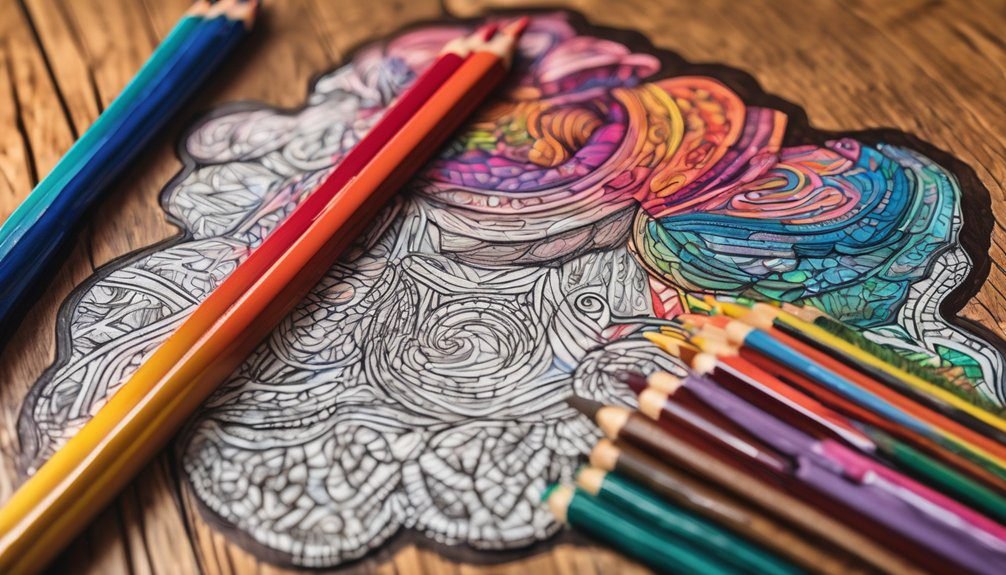
While you might think coloring is all about flat colors, adding textures and depth can elevate your artwork to a whole new level.
Start by layering your colors; use lighter shades first and gradually add darker tones to create dimension. Experiment with different coloring techniques like hatching, cross-hatching, or stippling to give your artwork a tactile feel.
Layering colors and experimenting with techniques like hatching can add stunning dimension to your artwork.
You can also incorporate materials like pastels, colored pencils, and markers to achieve various textures. Don’t shy away from mixing mediums; for example, combine watercolor with colored pencils for unique effects.
Finally, think about the background—adding subtle patterns or gradients can enhance depth. With these techniques, your coloring will transform into captivating art that draws the eye and sparks conversation.
Experimenting With Color Palettes
Color palettes can make or break your artwork, and experimenting with different combinations can lead to stunning results.
Start by selecting a base color that speaks to you. From there, consider complementary colors to enhance your design. Don’t shy away from using bold, contrasting hues; they can add excitement and depth to your piece.
Try creating a monochromatic scheme by varying shades of a single color for a more harmonious look. You might even explore unexpected palettes by mixing warm and cool tones.
Remember to test your choices on scrap paper before committing. Trust your instincts, and let your creativity flow.
With practice, you’ll discover unique combinations that truly resonate with your artistic vision.
Framing Your Finished Pieces
Framing your finished pieces is crucial for showcasing your artwork and giving it the attention it deserves. A well-chosen frame can enhance your colors and add a polished touch.
Start by selecting a frame that complements your artwork’s style and colors. Consider options like simple black or white frames for a modern look, or ornate designs for a classic feel. Make sure to use acid-free materials to protect your work from fading over time.
When framing, ensure your piece is centered and straight, minimizing distractions. Don’t forget to add a matting layer; it creates a visual buffer and elevates your piece.
Finally, hang your artwork at eye level to maximize impact and invite admiration from viewers.
Creative Display Ideas for Your Art
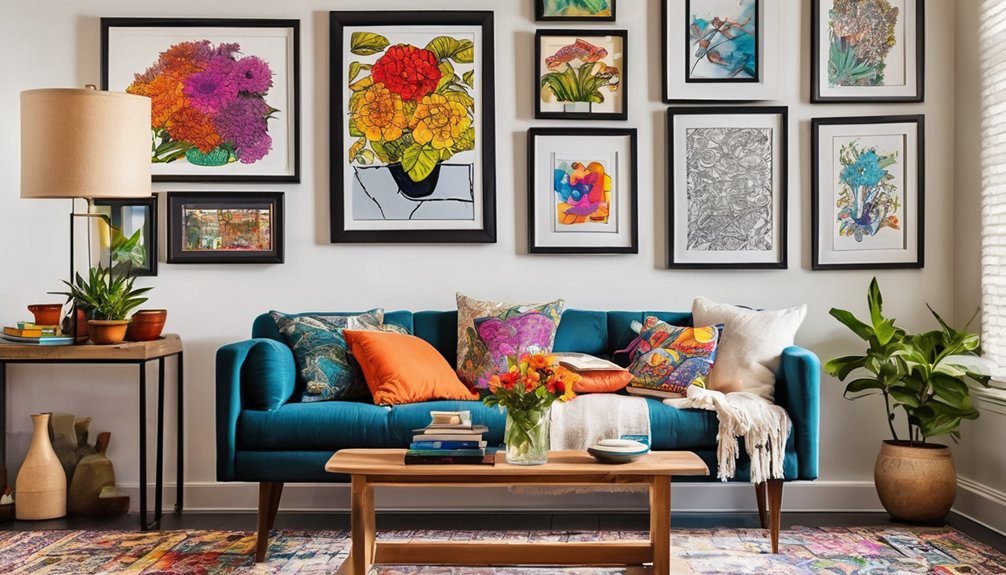
Displaying your art creatively can transform any space and make your pieces stand out. Consider creating a gallery wall; mix sizes and frames for an eclectic look.
You can also use a clothesline or wire with clips to display your artwork—it’s easy to change out pieces as you create more. If you want a modern touch, try floating shelves to showcase your art alongside books and plants.
Don’t forget about vertical space; hang art at varying heights to draw the eye upward. For a unique twist, use a decorative ladder to lean your favorite pieces.
Personalizing Your Artwork With Mixed Media
While you might think of coloring as a simple pastime, incorporating mixed media can elevate your artwork into something truly personal and unique. By combining different materials, you can add depth and texture to your pieces. Consider using items like fabric, scrapbook paper, or even photographs alongside your colored designs.
Here’s a table to spark your creativity:
| Material | Purpose | Example Use |
|---|---|---|
| Fabric | Texture | Add swatches to backgrounds |
| Scrapbook Paper | Color & patterns | Create layered designs |
| Photographs | Personal touch | Integrate family memories |
| Paint | Depth & dimension | Highlight certain areas |
Experiment with these elements to create a stunning, one-of-a-kind artwork that reflects your personality!
Hosting a Coloring Party for Friends and Family
If you want to bring friends and family together for a fun and creative experience, hosting a coloring party is a fantastic idea.
Start by choosing a cozy space with plenty of light. Gather a variety of coloring books and supplies, like colored pencils, markers, and gel pens. Send out invites, encouraging everyone to bring their favorite snacks and drinks.
Set up tables with plenty of seating, and create a relaxing atmosphere with music or light decor. As everyone settles in, share coloring tips or techniques to spark creativity.
Don’t forget to showcase everyone’s finished pieces at the end! This way, you’ll celebrate each other’s artwork and enjoy a memorable, colorful day together.
Frequently Asked Questions
Can I Use Digital Tools for Coloring Instead of Traditional Materials?
Yes, you can definitely use digital tools for coloring! Digital apps offer a wide range of colors and effects, allowing you to create vibrant artwork without the mess of traditional materials. Enjoy the convenience and creativity!
How Do I Choose the Best Paper for Coloring?
Choosing the best paper for coloring is like finding the holy grail of creativity! Opt for thick, smooth paper that can handle your medium, whether it’s colored pencils, markers, or watercolor, to achieve stunning results.
What Are Some Common Mistakes to Avoid While Coloring?
Avoid pressing too hard on your coloring tool, as it can ruin your paper. Don’t skip blending colors, and steer clear of tight, rushed strokes. Lastly, remember to keep your workspace organized for better results!
How Can I Preserve My Finished Coloring Artwork?
You can preserve your finished coloring artwork by sealing it with a spray fixative or framing it behind glass. Imagine the vibrant colors lasting—protecting your creations from fading, smudging, and dust for years to come.
Is There a Specific Age Group for Adult Coloring Books?
Adult coloring books cater primarily to teens and adults, typically ages 12 and up. They’re designed to relieve stress and encourage creativity, so anyone looking to unwind can enjoy them, regardless of age.
Conclusion
As you transform your coloring into art, remember that each stroke is a reflection of your unique journey. Isn’t it amazing how a simple page can become a vibrant expression of who you are? By choosing the right materials, experimenting with techniques, and displaying your work creatively, you’re not just decorating your home—you’re weaving your story into its fabric. So grab those colors, let your imagination soar, and watch your space come alive with your artistry!