When you’re coloring, avoiding smudges and ink bleed can make a big difference in your artwork’s quality. You’ll want to choose the right tools and paper to start. Testing your materials beforehand can save you from frustration later on. But it doesn’t stop there—layering techniques and proper drying times play crucial roles too. Curious about what else you can do to ensure a clean finish?
Key Takeaways
- Use quality paper (80 lb or heavier) to prevent warping and ink bleed.
- Opt for water-based markers to minimize ink bleed during coloring.
- Test your materials on a scrap piece to check for smudging or bleed.
- Allow each layer of color to dry completely before adding more.
- Maintain a clean workspace to avoid accidental smudges and distractions.
Choose the Right Coloring Tools
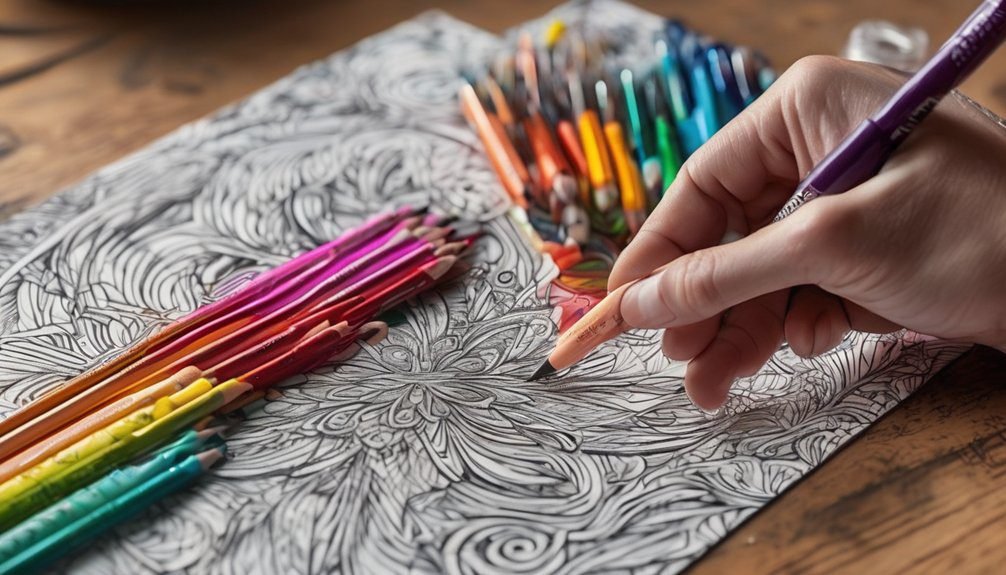
When you’re ready to dive into coloring, choosing the right tools can make all the difference. Start with quality colored pencils or markers that offer smooth application and rich pigmentation. Look for brands known for their blendability and durability.
Choosing quality colored pencils or markers is essential for smooth application and vibrant results in your coloring journey.
If you prefer markers, opt for those that are water-based to reduce ink bleed.
Don’t forget about your eraser; a good kneaded eraser can help you fix mistakes without damaging your paper. For those who like to add depth, consider using blending stumps or even a cotton swab for smooth gradients.

Lastly, keep your tools organized and clean to maintain their performance. With the right tools, you’ll set yourself up for a successful, mess-free coloring experience.
Use Quality Paper
Selecting the right coloring tools is just one part of the equation; the type of paper you use plays a significant role in your coloring experience.
Using quality paper can prevent smudges and ink bleed, ensuring your artwork looks its best. Here are a few tips to consider when choosing your paper:
- Weight: Opt for heavier paper (around 80 lb or more) to handle more ink without warping.
- Texture: Smooth paper is ideal for markers, while textured paper works well with colored pencils.
- Acid-Free: Ensure the paper’s acid-free to prevent yellowing and deterioration over time.
Test Your Materials
Testing your materials is essential for a successful coloring experience. Before diving into your project, grab a scrap piece of paper to try out your coloring tools. Apply the markers, colored pencils, or gel pens you plan to use and see how they react.
Check for ink bleed or smudging by layering colors or pressing hard. This will help you understand how your materials perform on the paper you’ve chosen. If your colors bleed through, consider switching to a different paper or using a lighter touch.
Don’t forget to let your colors dry completely before handling your work. By taking these simple steps, you’ll ensure a smoother coloring process and better results. Happy coloring!
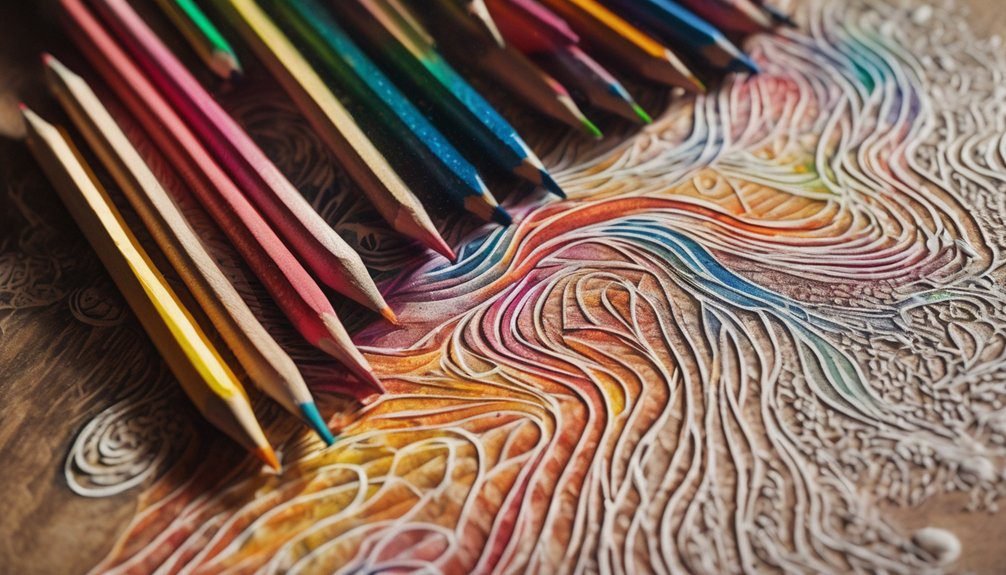
Layering Techniques

Although layering techniques can seem daunting at first, they’re essential for achieving depth and richness in your coloring projects.
To get started, think about these key strategies:
- Start Light: Begin with lighter colors to establish your base. This helps you build up gradually without overwhelming the paper.
- Blend Colors: Use complementary shades to create smooth transitions. Layering different hues can add dimension and interest to your work.
- Vary Pressure: Apply varying amounts of pressure as you layer. This technique helps you control how intense or soft each color appears.
Avoid Excessive Pressure
When layering colors, controlling the pressure you apply is key to avoiding unwanted smudges and ink bleed. If you press too hard, the ink can saturate the paper, causing it to bleed beyond the lines.
Instead, try using a light touch, gradually building up color intensity. This technique not only keeps your artwork neat but also allows for better blending and shading.
Using a gentle touch to layer colors enhances blending and keeps your artwork tidy.
If you notice any ink pooling, ease up on the pressure and adjust your technique. Remember, it’s about finesse, not force.
Experiment with different levels of pressure to find what works best for your chosen medium. By being mindful of how hard you press, you’ll achieve cleaner, more vibrant results without the hassle of smudging.
Allow Drying Time
To ensure your artwork remains smudge-free, it’s crucial to allow adequate drying time between layers. Rushing through this process can lead to unwanted ink bleed and smudges that ruin your hard work.
Take a moment to let each layer dry properly before adding more. Here are some tips to help you:
- Use a timer: Set a timer for drying intervals to keep track and avoid impatience.
- Check the surface: Gently touch the edge of your paper to see if it feels dry before proceeding.
- Choose the right environment: Work in a well-ventilated area to speed up drying, avoiding humid spaces.
Seal Your Artwork
Once your layers are fully dry, sealing your artwork helps protect it from smudges and ink bleed. You can use a spray fixative or a brush-on sealant, depending on your preference and the materials used.
When choosing a fixative, make sure it’s compatible with your medium—check the label for specifics.
Before applying, shake the can or stir the sealant well to ensure even coverage. Hold it at least 12 inches away and spray in light, sweeping motions.
If you’re using a brush-on sealant, apply a thin coat with a clean brush, making sure not to over-saturate the paper.
Allow the sealant to dry completely before handling your artwork to ensure it stays protected and vibrant.
Keep Your Workspace Clean
A clean workspace is essential for preventing smudges and ink bleed while you color. When your area is organized, you can focus better on your artwork and avoid accidental messes.
A tidy workspace enhances focus and prevents messes, ensuring your coloring experience remains enjoyable and clean.
Here are a few tips to keep your workspace tidy:
- Clear the clutter: Remove any unnecessary items from your table. This not only creates space but also minimizes distractions.
- Use protective surfaces: Lay down a clean sheet of paper or a cutting mat to catch any stray ink or color. This helps protect your original artwork.
- Organize your tools: Keep your coloring supplies, like pens and markers, in designated areas. This makes it easier to find what you need without creating chaos.
Practice Patience and Precision
While coloring, practicing patience and precision can make a significant difference in the quality of your work. Rushing through your project often leads to smudges and ink bleed. Take your time to stay within the lines, and don’t hesitate to pause and reassess your technique. Here’s a simple checklist to help you focus on these essential skills:
| Tip | Description |
|---|---|
| Slow Down | Give yourself time to color carefully. |
| Steady Hand | Keep your hand steady for clean lines. |
| Light Pressure | Use light pressure to avoid ink bleed. |
Frequently Asked Questions
What Types of Coloring Tools Are Best for Beginners?
For beginners, colored pencils and water-based markers are great choices. They’re easy to control and offer vibrant colors. You’ll find them forgiving, allowing you to practice techniques without overwhelming frustration or mess. Enjoy your coloring journey!
How Do I Choose the Right Paper Weight for Coloring?
Choosing the right paper weight is like picking the perfect canvas for your masterpiece. Go for at least 80 lb for vibrant colors, and don’t forget to test your tools to ensure a smooth experience.
Can I Mix Different Ink Types Without Causing Bleeding?
You can mix different ink types, but it’s tricky. Some inks might bleed into others, so test them on a scrap piece first. You’ll get a better idea of how they interact before committing.
What Is the Best Way to Store My Colored Artwork?
To store your colored artwork, keep it flat in a protective sleeve or portfolio. Avoid stacking pieces directly on top of each other to prevent damage. Ensure they’re in a cool, dry place for longevity.
How Can I Fix Smudges After They Occur?
About 70% of artists experience smudges at some point. To fix them, gently erase with a soft eraser, use blending tools to soften edges, or strategically layer colors to disguise imperfections without damaging your artwork.
Conclusion
By following these tips, you can create vibrant, smudge-free artwork that rivals the masterpieces of renowned artists. Think of your coloring journey as a delicate dance, where each step requires precision and care. As you layer colors and allow them to dry, you’re crafting your own story on paper, much like an author weaving words into a captivating tale. So, embrace patience and enjoy the process—your artwork will shine, free from the shadows of smudges and ink bleed.