When you’re sketching a vibrant sunset with gel pens, choosing the right colors and techniques can make all the difference. It’s not just about picking up a pen; it’s about understanding how to use them effectively on various surfaces. From layering to blending, each step influences your final piece. Curious about the best tips for achieving that perfect finish? Let’s explore the essential techniques that can elevate your gel pen art.
Key Takeaways
- Choose the right tip size and ink type for your specific project and desired effects.
- Prepare your surface by using smooth, clean paper and testing pens on scrap material.
- Master techniques like varying pressure, cross-hatching, and dot work for creative designs.
- Layer colors starting with lighter shades, allowing each layer to dry to prevent smudging.
- Troubleshoot skipping pens by shaking them, cleaning tips, and storing them horizontally.
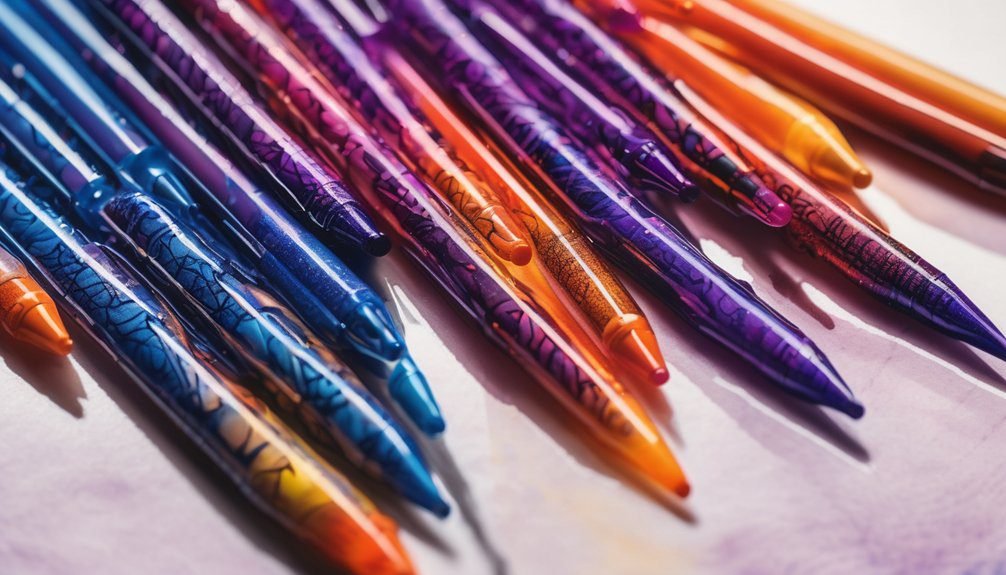
Choosing the Right Gel Pens for Your Project
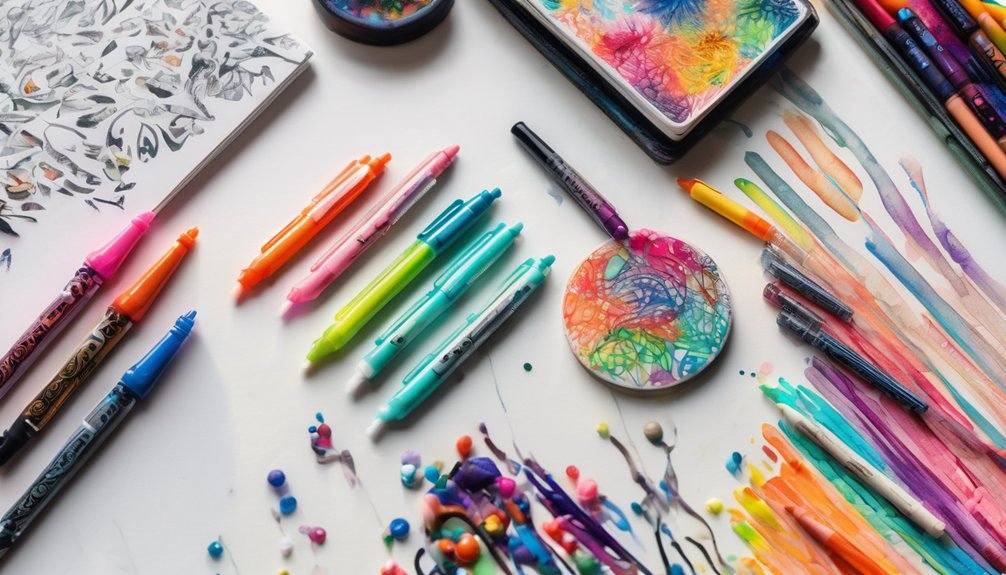
Choosing the right gel pens for your project can make all the difference in your final result. You’ll want to consider the pen’s tip size; finer tips are perfect for detailed work, while broader tips are great for filling in larger areas.
Look at the ink type, too—metallic or glitter inks can add flair, while traditional colors keep it classic. Think about the surface you’ll be using; some pens work better on glossy surfaces, while others are designed for paper.
Test a few out to see how they feel in your hand; comfort is key. Lastly, check the drying time; if you’re working quickly, you don’t want smudging to ruin your masterpiece.
Choose wisely, and enjoy the process!

Preparing Your Surface for Optimal Results
To achieve the best results with your gel pens, preparing your surface is essential. A clean and suitable surface can make a significant difference in how your artwork turns out.
Preparing your surface is crucial for achieving stunning results with gel pens in your artwork.
Here are some tips to ensure your surface is ready:
- Choose the right paper: Opt for smooth, high-quality paper to prevent bleeding and feathering.
- Clean the surface: Wipe any dust or oils off the area where you’ll be working; this helps the ink flow smoothly.
- Test before you start: Always do a quick test on a scrap piece to check for compatibility.
- Consider temperature and humidity: Gel pens perform best in moderate conditions; avoid extreme heat or humidity for optimal ink flow.
With these steps, you’ll be set to create stunning art with your gel pens!
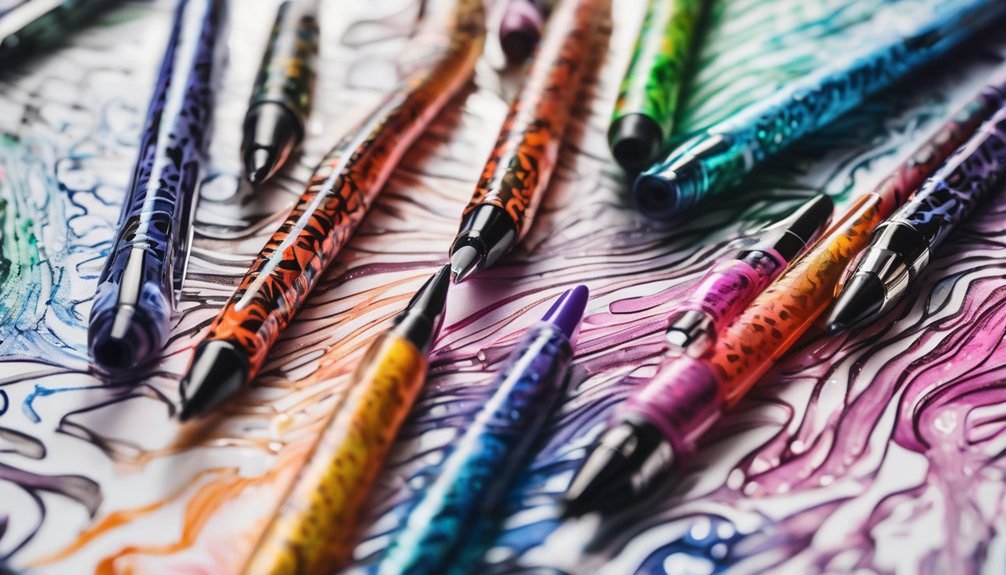
Mastering Different Techniques With Gel Pens
While mastering different techniques with gel pens, you’ll discover how versatile these tools can be in your creative projects.
Experiment with line work by varying pressure; lighter strokes create delicate lines, while heavier pressure produces bold, striking effects.
Try cross-hatching for shading—layer your strokes to add depth and dimension. For intricate designs, utilize dot work; dots can form patterns or textures that enhance your artwork.
Don’t forget to practice your hand lettering; gel pens can add a beautiful flourish to your writing. When working on detailed pieces, consider using a ruler or stencil for precision.
Lastly, combine techniques to create unique styles, blending line art with dot work or lettering for a captivating final piece.
Enjoy the endless possibilities!
Layering and Blending Colors Effectively
After mastering various techniques with gel pens, you can take your creativity to the next level by layering and blending colors effectively.
Start with lighter colors as your base, then gradually add darker shades on top. This approach creates depth and richness in your artwork.
Here are some tips to enhance your layering and blending skills:
- Use smooth strokes: Apply even pressure for consistent coverage.
- Mix colors on paper: Overlap colors directly to create new shades.
- Experiment with transparency: Try translucent layers for softer blends.
- Let layers dry: Allow each layer to dry before adding more to prevent smudging.
With practice, you’ll achieve stunning effects that elevate your gel pen creations!
Troubleshooting Common Gel Pen Issues
Gel pens can sometimes face a few common issues that can be frustrating for artists. If your pen skips, try shaking it gently or pressing the tip against a scrap piece of paper to get the ink flowing.
For pens that won’t write at all, check if the cap is on too tightly or if the ink has dried. If the tip is clogged, you can carefully clean it with a damp cloth.
Also, if your ink is smudging, give it a few moments to dry before touching it. Remember, using gel pens on the right paper can help prevent these issues.
Experimenting with different surfaces can lead to a smoother experience. Don’t let these problems discourage you; troubleshoot and keep creating!
Storing Your Gel Pens Properly
Proper storage is essential for keeping your gel pens in top condition. By following a few simple guidelines, you can ensure they last longer and perform better.
Here are some tips for storing your gel pens:
- Keep them upright: Store your pens vertically with the tips up to prevent ink from drying out.
- Avoid extreme temperatures: Keep them in a cool, dry place, away from direct sunlight and heat sources.
- Use a case or holder: Organize your pens in a dedicated case to prevent them from rolling around or getting damaged.
- Check regularly: Inspect your pens often for signs of drying or damage to address any issues promptly.
Exploring Various Paper Types for Gel Pen Use
When choosing the right paper for your gel pens, it’s important to consider how different textures and weights can affect your writing experience.
Smooth papers, like those used for printing or high-quality stationery, allow your pen to glide effortlessly, resulting in clean lines. Heavier weights, such as cardstock, can absorb more ink without bleeding, making them ideal for detailed work.
However, textured papers, like watercolor or sketch paper, may cause your pen to skip or create uneven lines. Experiment with various options to find what suits your style best.
Incorporating Gel Pens Into Mixed Media Art
Combining gel pens with other mediums can elevate your mixed media art projects to new heights. They add vibrant colors and intricate details that can bring your creations to life.
Gel pens enhance mixed media art with vibrant colors and intricate details, bringing your creations to life.
Here are some ways you can incorporate gel pens into your art:
- Highlighting: Use gel pens to emphasize specific areas in your artwork, creating depth and focus.
- Detailing: Add fine lines or patterns to complement your primary medium, whether it’s paint, collage, or ink.
- Layering: Experiment with layering gel pen designs over watercolor or acrylics for a unique texture and finish.
- Doodling: Incorporate whimsical doodles around your main subjects to enhance your artwork’s overall character.
Let your creativity flow, and enjoy the endless possibilities that gel pens can bring to your mixed media projects!
Cleaning and Maintaining Your Gel Pens
To keep your gel pens performing at their best, regular cleaning and maintenance are essential. Start by regularly capping your pens to prevent them from drying out.
If a pen does dry, try storing it tip-down for a few hours to restore ink flow. For stubborn clogs, gently wipe the nib with a damp cloth or dip it in warm water for a few minutes. Make sure to dry it thoroughly before using it again.
Additionally, avoid exposing your gel pens to extreme temperatures, which can affect ink consistency. Lastly, store your pens horizontally to maintain even ink distribution.
Frequently Asked Questions
Can Gel Pens Be Used on Fabric or Textiles?
Yes, you can use gel pens on fabric or textiles, but they might not be permanent. Make sure to test on a small area first, and consider heat-setting to improve durability and wash resistance.
Are Gel Pens Safe for Children to Use?
Yes, gel pens are generally safe for children. Most are non-toxic and washable, but always check the label. Supervise younger kids to prevent accidental ingestion, ensuring a fun, creative experience without worries.
How Long Do Gel Pens Typically Last?
Gel pens typically last anywhere from a few weeks to several months, depending on usage and quality. If you use them regularly, you might notice ink running out sooner than if you use them occasionally.
Can Gel Pens Be Used for Professional Artwork?
Absolutely! Gel pens can elevate your artwork to dazzling heights. Their vibrant colors and smooth flow make them perfect for professional pieces. You’ll love how they bring your imagination to life with every stroke.
What Is the Difference Between Gel Pens and Regular Ink Pens?
Gel pens use a water-based gel for smooth application and vibrant colors, while regular ink pens typically use oil-based ink. You’ll notice gel pens offer more flexibility and creativity in your writing or drawing projects.
Conclusion
Now that you’re armed with gel pen know-how, you can transform your creative visions into vibrant realities. Like a painter with a brush, you have the power to make your ideas pop on paper. Remember to experiment, layer your colors, and keep your tools in top shape. With a little practice, your gel pen artistry will shine brighter than a star in the night sky. Dive in, and let your imagination take flight!