Blending techniques can really elevate your coloring projects. By mastering methods like circular motions and feathering, you can create smooth transitions that add depth to your artwork. It’s all about finding the right tools, whether it’s blending stumps or colorless blenders. As you experiment with different mediums, you’ll discover unique textures that can transform your pieces. So, what specific techniques can you incorporate to enhance your color blending skills even further?
Key Takeaways
- Utilize the circular motion technique for smooth transitions between colors, ensuring a seamless blend.
- Apply the feathering technique by layering colors, gradually increasing pressure for depth.
- Experiment with blending tools like stumps and tortillons to achieve soft and detailed effects.
- Incorporate complementary and analogous colors to create striking contrasts or cohesive palettes.
- Practice layering with different mediums, such as colored pencils and pastels, for unique textures and finishes.
Understanding Color Theory

As you dive into the world of blending techniques, understanding color theory becomes essential. You’ll discover how colors interact, creating harmony or discord in your artwork.
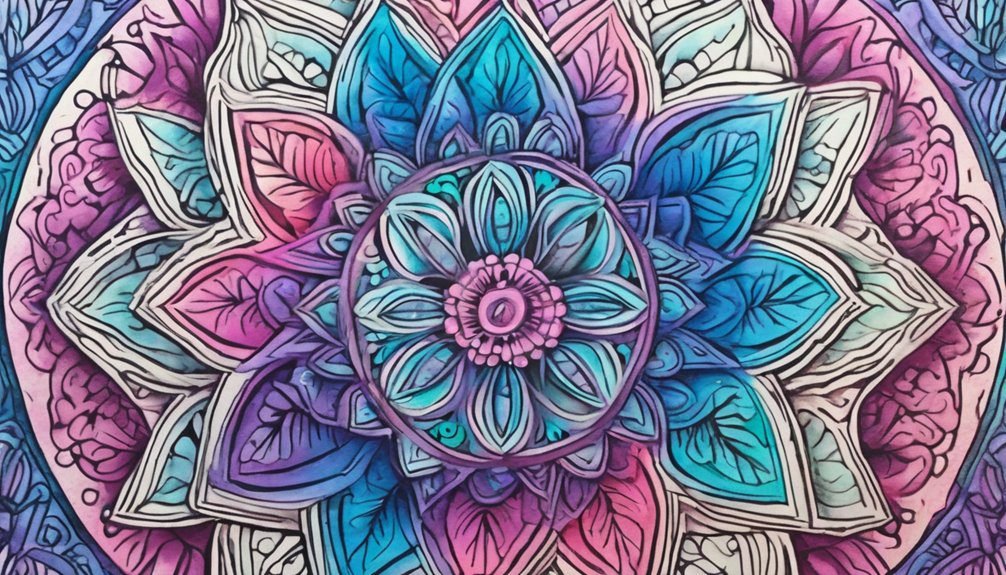
Familiarizing yourself with the color wheel is a great starting point. Primary colors—red, blue, and yellow—combine to form secondary colors, like green, orange, and purple.
By knowing complementary colors, such as blue and orange, you can create striking contrasts that make your work pop. Analogous colors, which sit next to each other on the wheel, produce a more subtle, cohesive effect.

Understanding complementary and analogous colors is key to creating impactful contrasts and harmonious blends in your artwork.
Keep in mind warm and cool colors; they evoke different emotions. By grasping these concepts, you’ll enhance your blending techniques and elevate your coloring skills to new heights.
Basic Blending Techniques
While mastering color blending might seem daunting at first, you can achieve stunning results with a few fundamental techniques.
Start with the circular motion; gently swirl your pencil or marker in small circles on the page. This helps create a smooth transition between colors.
Next, try the feathering technique—lightly layer one color on top of another, gradually increasing pressure to blend them seamlessly.
You can also use a blending stump or your finger to smudge colors together for a soft look. Remember to keep your strokes light to maintain the vibrancy of each shade.
Practice these techniques, and soon you’ll notice how easily you can create beautiful, blended artwork that captures depth and dimension.
Happy coloring!
Layering Colors for Depth
Building on those basic blending techniques, layering colors is an effective way to add depth to your artwork.
By applying multiple layers of color, you create a rich, dynamic effect that draws the viewer’s eye. Here are some tips to get you started:
- Start with a base color: Lay down your primary hue to establish a foundation.
- Add shadows: Use a darker shade to define areas and create dimension.
- Highlight with lighter tones: Apply lighter colors on top to bring certain areas forward and add brightness.
- Blend gently: Use soft strokes to merge layers without losing their distinctiveness.
Utilizing Tools for Blending

Blending tools can elevate your coloring experience, making it easier to achieve smooth transitions and rich textures. Whether you’re using colored pencils, markers, or pastels, the right tools can make a significant difference.
Consider incorporating these essential tools into your coloring kit:
| Tool | Purpose |
|---|---|
| Blending Stumps | Smooth out pencil marks |
| Colorless Blender | Blend colors seamlessly |
| Tortillons | Fine blending in tight areas |
| Sponges | Create soft textures |
Using these tools strategically allows you to manipulate colors effectively, enhancing your artwork. Don’t hesitate to experiment with them to see which combinations provide the best results for your unique style!
Experimenting With Different Mediums
Have you ever wondered how different mediums can transform your coloring projects?
Experimenting with various tools can open up a world of possibilities. Each medium brings its unique flair, allowing you to enhance your artwork in exciting ways.
- Colored Pencils: Layer colors for depth and precision.
- Markers: Achieve vibrant, bold hues with smooth application.
- Watercolors: Create soft gradients and washes for a dreamy effect.
- Pastels: Blend easily for a soft, velvety finish, perfect for blending.
Creating Texture Through Blending
While you might focus on colors, don’t underestimate the power of texture in your coloring projects. Blending techniques can create depth and interest, transforming flat images into dynamic pieces.
Start by layering different colors; use a lighter shade to highlight and a darker one for shadows. Experiment with pressure—apply varying pressure to your tools to achieve different textures. For instance, light pressure can produce a soft, airy feel, while heavy pressure can create bold, pronounced lines.
Layer colors for depth by using lighter shades for highlights and darker ones for shadows, adjusting pressure for varied textures.
You can also use a blending stump or your fingers to smudge colors together, producing smooth transitions that mimic natural textures. Incorporate stippling or cross-hatching to add unique effects.
With patience and practice, you’ll discover that texture enhances your artwork’s overall appeal.
Tips for Achieving Smooth Transitions
To achieve smooth transitions in your coloring, it’s essential to focus on the gradual shift between colors. Start by selecting your color palette carefully, ensuring the hues complement each other.
Use these tips to enhance your blending technique:
- Layering: Apply light layers of color, building up gradually for depth.
- Circular Motions: Use small circular strokes to blend the edges of your colors together seamlessly.
- Color Mixing: Blend colors on your palette before applying them to your paper for a smoother transition.
- Blending Tools: Experiment with blending stumps or soft brushes to create soft edges and avoid harsh lines.
Frequently Asked Questions
How Do I Fix Mistakes in My Coloring?
To fix mistakes in your coloring, gently erase or blend the area with a lighter shade. You can also use white gel pens or similar tools to cover errors. Don’t be afraid to experiment!
Can I Blend Colors Without a Blending Tool?
Absolutely, you can blend colors without a tool! Try using your fingers or a soft cloth to gently smudge colors together. Experiment with various techniques, and you’ll discover unique blends that suit your style.
What Types of Paper Work Best for Blending?
You’ll find that smooth, heavyweight paper works best for blending. Look for papers designed for colored pencils or markers, as they handle layering well and allow you to achieve beautiful, seamless color transitions.
How Can I Achieve a Watercolor Effect With Colored Pencils?
To achieve a watercolor effect, you can layer colors, use a wet brush to blend, or apply a colorless blender. Experiment with different papers, and don’t rush; patience will enhance your results beautifully!
Is It Necessary to Use Special Blending Solutions or Mediums?
It’s not necessary to use special blending solutions or mediums. You can achieve great results with just your colored pencils and techniques like layering or using a blending stump. Experiment and find what works best for you!
Conclusion
As you explore these blending techniques, imagine the vibrant masterpiece that awaits your touch. By mastering color theory, layering, and the right tools, you’ll breathe life into your artwork, creating depth and texture that captivates the eye. So, what will your next creation look like as colors dance and merge seamlessly on the page? Embrace experimentation, practice regularly, and watch your artistic skills flourish, transforming your coloring experience into a journey of endless possibilities.