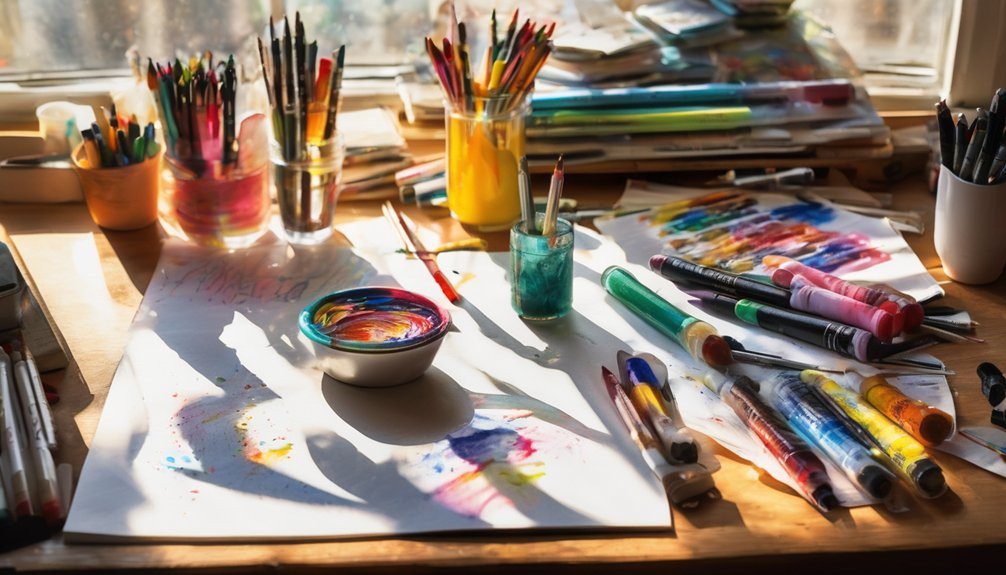
When you’re selecting markers, when you’re considering paper, and when you’re aiming for crisp artwork, it’s crucial to understand how these elements interact. Not all markers are created equal, and not all paper can handle them. The right combination can prevent bleed-through and keep your work looking sharp. So, what should you look for in markers and paper to achieve the best results? Let’s explore the essentials you need to know.
Key Takeaways
- Select water-based or alcohol-based markers specifically designed to prevent bleed-through for optimal results.
- Use thicker, smooth, or specially coated papers to minimize ink absorption and bleeding.
- Test markers on similar scrap paper to assess bleeding, feathering, and overall performance before starting your project.
- Look for markers with fine tips or dual tips for precise control and reduced bleed-through.
- Consider reputable brands like Copic, Sharpie, and Staedtler that are known for non-bleeding marker options.
Understanding Paper Types and Their Impact

When you choose markers for your projects, understanding the type of paper you’re using is crucial. Different papers absorb ink in various ways, directly affecting how much bleeds through.
For instance, standard printer paper tends to soak up ink quickly, causing unsightly bleed-through, while thicker papers or cardstock often resist it better. If you’re working on intricate designs, opt for smooth, heavy-weight paper designed specifically for markers. This type minimizes bleeding and allows for crisp lines.
Additionally, consider the paper’s finish; glossy surfaces can sometimes repel ink, leading to unexpected outcomes. So, always test your markers on a small section of your chosen paper before diving in to ensure you achieve the results you want without any surprises.

Exploring Different Marker Types
As you dive into the world of markers, it’s essential to recognize the variety available and how each type can impact your artwork.
You’ll find alcohol-based markers, which blend beautifully and dry quickly, making them popular among illustrators. Water-based markers, on the other hand, are great for layering and are easier to clean up, but they can struggle with bleed-through on thinner paper.
Then there are permanent markers, known for their vibrant colors and durability, perfect for long-lasting projects. Finally, consider brush markers, which offer versatility with their flexible tips, allowing for varied line thickness.
Permanent markers provide vibrant colors and durability, ideal for projects requiring longevity, while brush markers offer flexible tips for varied line thickness.
Each marker type has its unique strengths, so choose wisely based on your artistic needs and preferences.
Key Features to Look For in Non-Bleeding Markers
To ensure your artwork remains crisp and clean, focus on a few key features when selecting non-bleeding markers.
These attributes will help you choose the best tools for your creative projects.
- Ink Formula: Look for markers with water-based or alcohol-based inks designed specifically to prevent bleeding.
- Nib Type: Opt for fine tips or dual tips that allow for precise control, reducing the risk of ink spreading.
- Paper Compatibility: Check that the markers work well with the type of paper you’re using, as thicker or specially coated papers can minimize bleed-through.
Testing Markers Before Use

Before diving into your next project, it’s essential to test your markers to ensure they perform as expected.
Start by grabbing a scrap piece of paper similar to your project surface. Try out each marker, noting how they apply, the vibrancy of the color, and drying time. Pay attention to any bleeding or feathering on the edges.
You’ll also want to test how the ink reacts with water or other mediums, as some markers might smudge. After testing, make a note of which markers passed your criteria and which didn’t.
This simple step saves you frustration later, ensuring your creativity flows smoothly without unexpected surprises. Always remember, a little prep work goes a long way in achieving great results.
Tips for Using Markers Effectively
After testing your markers, it’s time to put them to good use. To ensure your artwork or notes shine without bleeding, follow these effective tips:
- Layer your colors: Start with lighter shades before moving to darker ones. This technique helps maintain vibrancy without overwhelming your paper.
- Use the right paper: Choose thicker, bleed-resistant paper designed for markers. This will keep your colors crisp and your work tidy.
- Practice control: Hold your markers at an angle and use gentle pressure. This reduces the chances of excess ink soaking through.
Recommended Brands for Non-Bleeding Markers
While exploring the world of markers, you’ll find several brands that consistently deliver non-bleeding options perfect for your projects.
One standout is Copic, known for their high-quality, alcohol-based markers that offer vibrant colors without the risk of bleeding.
Copic markers deliver vibrant colors and high quality, ensuring your artwork remains pristine without bleeding.
Another great choice is Sharpie, particularly their fine point markers, which are excellent for detailed work.
Prismacolor also deserves a mention for their dual-tipped markers, providing versatility and minimal bleed-through.
Lastly, consider the Staedtler Triplus Fineliner, which features a unique design that prevents ink from soaking through paper.
Each of these brands combines reliability with performance, ensuring you can create stunning artwork without worrying about unwanted ink marks on the other side of your page.
Creative Techniques to Minimize Bleeding
To achieve crisp, clean lines in your artwork, employing creative techniques to minimize bleeding can make a significant difference. Here are a few strategies you can try:
- Layering: Start with lighter colors and gradually build up darker shades. This prevents overwhelming saturation, which often leads to bleeding.
- Using a Barrier: Apply a clear medium or a piece of washi tape around your design to create a protective barrier that absorbs excess ink.
- Choosing the Right Paper: Opt for thicker, high-quality paper designed for markers. It’s less likely to absorb ink too quickly, reducing bleed-through.
Implementing these techniques won’t only enhance your artwork but also ensure that your markers perform at their best!
Frequently Asked Questions
Can I Use Non-Bleeding Markers on Watercolor Paper?
Yes, you can use non-bleeding markers on watercolor paper. Just make sure they’re compatible with the paper’s texture. Experiment a little to find the right balance for your artwork without causing unwanted bleeding.
How Do I Clean Dried Marker Stains From Surfaces?
Wipe away dried marker stains like clouds parting for sunshine. You can use rubbing alcohol on a cloth, gently scrubbing until the stain disappears. For stubborn marks, a magic eraser works wonders, bringing surfaces back to life.
Are There Eco-Friendly Non-Bleeding Marker Options Available?
Yes, there are eco-friendly non-bleeding marker options available. Look for brands that use water-based inks and sustainable materials. These markers provide vibrant colors while minimizing environmental impact, giving you peace of mind during your creative projects.
What Is the Shelf Life of Non-Bleeding Markers?
Non-bleeding markers typically last 1 to 3 years, but you’ll want to store them upright, away from sunlight. Imagine vibrant colors waiting patiently, ready to bring your creations to life whenever inspiration strikes!
Can Non-Bleeding Markers Be Used on Fabric?
Yes, non-bleeding markers can be used on fabric. They’re great for creating designs without worrying about smudging. Just make sure to heat-set your artwork afterward to ensure it lasts through washes and wear.
Conclusion
Choosing markers that don’t bleed through might seem tricky, but it’s totally doable with the right approach. You might think all markers bleed, but by selecting alcohol-based options and quality paper, you can achieve vibrant results without the mess. Plus, testing your markers first ensures you’re set up for success. So don’t hesitate—dive into your creative projects with confidence! You’ll be amazed at how clean and crisp your artwork can be when you follow these tips.