It’s funny how combining watercolors with coloring pages can transform your creative process. You might think coloring is just for kids, but adding watercolors opens up a world of artistic possibilities. By choosing the right designs and mastering various techniques, you’ll discover how to elevate your work. Curious about how to start this unique fusion? Let’s explore the essentials that will help you create stunning pieces.
Key Takeaways
- Choose coloring pages with bold outlines and suitable complexity to enhance the watercolor experience.
- Use quality watercolor paper to prevent warping when applying wet paint.
- Employ wet-on-wet and wet-on-dry techniques to achieve various blending effects in your artwork.
- Keep your workspace organized with all supplies within reach for a smooth coloring process.
- Preserve finished pieces with a fixative and store them in a dry, dust-free environment.
Choosing the Right Coloring Pages
When you’re selecting coloring pages for your watercolor projects, what elements do you prioritize? Think about the complexity of the designs. If you’re just starting, you might prefer simpler patterns that allow for easier color application.
On the other hand, more intricate designs can challenge your skills and provide a richer experience. Next, consider the outlines. Bold, clear lines will help you stay within the boundaries as you paint.
Additionally, look for pages that inspire you; whether it’s floral, abstract, or whimsical themes, your interest will keep you engaged. Finally, check the paper quality. Thicker paper holds up better against water and paint, ensuring your artwork remains vibrant and intact.
Choose wisely, and enjoy the process!

Essential Watercolor Supplies
To create stunning watercolor artworks, you’ll need a few essential supplies that can make a significant difference in your experience.
Start with a quality set of watercolors—whether tubes or pans, choose what feels right for you. You’ll also need watercolor paper, specifically designed to handle moisture without warping.
Don’t forget a variety of brushes; a few round and flat brushes in different sizes will give you versatility. A palette for mixing colors is crucial, along with clean water and paper towels for control.
Finally, consider a masking fluid to preserve areas of your coloring page. With these supplies at hand, you’re ready to dive into the vibrant world of watercolors and unleash your creativity!
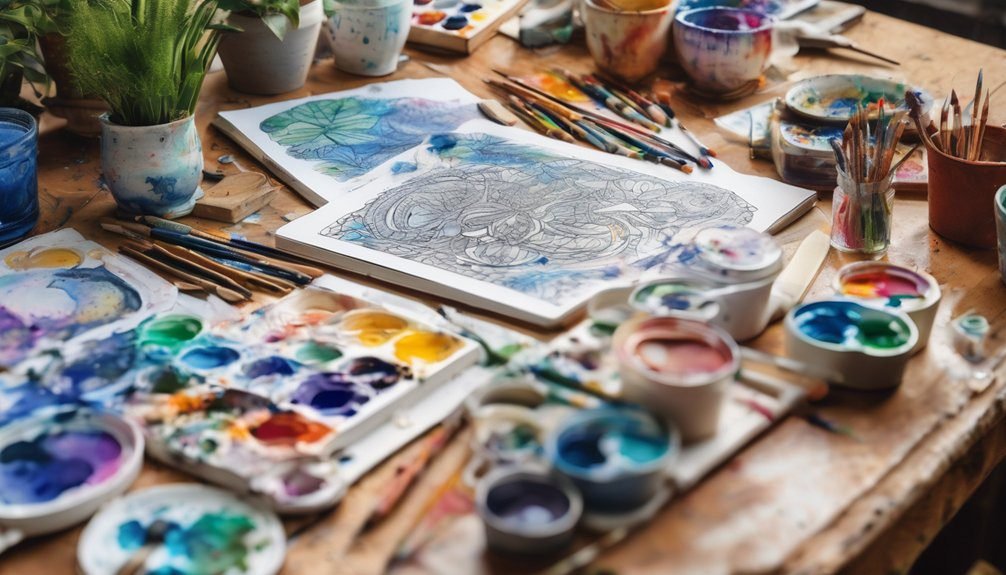
Preparing Your Workspace
A well-prepared workspace can make all the difference in your watercolor experience. Start by choosing a flat, sturdy surface that’s free from clutter. Lay down some protective covering, like newspaper or a plastic sheet, to catch any spills.
Gather your supplies close by—watercolor paints, brushes, a palette, and your coloring pages—so everything’s within reach. Make sure you have a cup of clean water for rinsing brushes and a few paper towels handy for quick clean-ups.
Consider using a small container for mixing colors. Good lighting is essential, so set up near a window or use a bright lamp. With everything organized, you’ll feel more focused and ready to unleash your creativity on those coloring pages!
Techniques for Blending Watercolors
Blending watercolors can transform your artwork by creating smooth transitions and depth. To achieve this, try using wet-on-wet techniques, where you apply wet paint onto wet paper or previously painted areas. Alternatively, use a wet-on-dry method for sharper edges. Here’s a simple guide:
| Technique | Description |
|---|---|
| Wet-on-Wet | Apply wet paint to wet paper for soft blends. |
| Wet-on-Dry | Paint on dry paper for defined edges. |
| Lifting | Use a damp brush to lift color for highlights. |
Experiment with these techniques to see how they influence your blending. Don’t be afraid to mix colors right on your palette or paper, and enjoy the beautiful, fluid effects that emerge!
Creating Depth With Layering
Layering is a powerful technique that adds depth and dimension to your watercolor paintings. Start by applying a light wash as your base.
Once it dries, you can build up additional layers, using slightly darker shades to create shadows and highlights. Don’t rush; let each layer dry before adding the next. This method allows you to observe how colors interact, enhancing the overall visual appeal.
Build layers gradually, allowing each to dry, revealing the beauty of color interactions and enhancing your painting’s visual depth.
Focus on areas where you want to draw attention, gradually intensifying the color for a more three-dimensional look. Remember, less is often more; subtlety can be just as effective as bold strokes.
Experiment with different layering techniques, and you’ll discover unique textures that elevate your work and keep the viewer engaged.
Experimenting With Color Combinations
Building on the depth achieved through layering, experimenting with color combinations can transform your artwork in exciting ways. Don’t be afraid to mix unexpected hues; combining warm and cool colors can create striking contrasts.
For instance, pairing a vibrant orange with a soothing blue can evoke a sense of energy and calm simultaneously. Try using complementary colors to make specific elements pop or analogous colors for a harmonious feel.
You might also consider using gradients, blending shades to create smooth transitions. As you explore different combinations, take note of how they interact with the paper and each other.
Each experiment won’t only enhance your understanding of color theory but also add a unique flair to your watercolor creations.
Adding Details With Fine Lines

As you refine your watercolor artwork, adding details with fine lines can elevate your pieces to new heights. Once your colors dry, grab a fine-tipped pen or brush to enhance your design.
Focus on outlines, textures, and intricate patterns that can bring depth and definition to your work. Whether you’re emphasizing the veins of leaves or the delicate features of a flower, those fine lines add an extra layer of interest.
Don’t hesitate to experiment with varying line weights; thicker lines can create a bold impact, while thinner ones can maintain a subtle elegance.
Tips for Preserving Your Artwork
After you’ve added those fine lines to enhance your watercolor artwork, it’s important to think about how to keep it looking its best.
Preserving your masterpiece ensures you can enjoy it for years to come. Here are a few tips to help you maintain your artwork:
- Use a fixative: Spray a light coat of fixative to protect your work from smudging or fading.
- Store properly: Keep your artwork in a cool, dry place. Use a portfolio or frame to minimize exposure to dust and light.
- Avoid moisture: Watercolors can be sensitive to humidity. Keep your artwork away from damp areas to prevent any damage.
Frequently Asked Questions
Can I Use Regular Coloring Pages With Watercolors?
Yes, you can use regular coloring pages with watercolors! Just make sure the paper is thick enough to handle the water. Experiment with techniques, and you’ll create beautiful, vibrant artwork that enhances your coloring experience.
How Do I Prevent Paper From Warping?
To prevent paper from warping, you can stretch it before painting. Tape the edges to a flat surface, dampen it slightly, and let it dry. Alternatively, use thicker watercolor paper designed to withstand moisture.
What Type of Watercolors Work Best for Coloring Pages?
Like a painter selecting the perfect brush, you’ll find that tube watercolors and high-quality pan sets work best for coloring pages. They offer vibrant colors and blend effortlessly, enhancing your artwork’s beauty and depth.
Are There Specific Coloring Pages Designed for Watercolors?
Yes, there are specific coloring pages designed for watercolors. These pages often feature thicker paper and bold outlines, allowing you to apply watercolors without bleeding through, ensuring a beautiful finished result that you’ll love.
How Do I Fix Mistakes Made With Watercolors?
About 70% of artists make mistakes with watercolors. To fix them, you can gently lift paint with a damp brush, apply a lighter wash over the area, or use white gouache for corrections.
Conclusion
As you blend watercolors with coloring pages, remember that every stroke is a brush with creativity, much like an artist painting their own vibrant story. Embrace the joy of experimentation and let your imagination flow, creating a masterpiece that reflects your unique vision. Just as a flower blooms with care, your artwork will flourish with patience and practice. So, dive in, enjoy the process, and watch your world transform into a kaleidoscope of color and expression.