When it comes to shading with markers, understanding your light source is crucial. It informs where shadows should fall and how to add depth to your work. You’ll need to master a few essential techniques to create smooth gradients and textures. But before you dive in, it’s important to consider the tools and methods that will elevate your shading game. Let’s explore the fundamentals that will make your art stand out.
Key Takeaways
- Identify the light source to determine where shadows and highlights should be placed in your artwork.
- Use hatching and cross-hatching techniques for simple and deeper shading effects.
- Choose complementary colors for blending and apply them in layers for smooth transitions.
- Utilize blending tools like colorless blenders to merge colors seamlessly for gradients.
- Experiment with different strokes and layering to create various textures and depth in your shading.
Understanding Different Types of Markers

Markers come in various types, each designed for specific purposes and effects. You’ll find alcohol-based markers, perfect for blending and vibrant colors, making them a favorite among artists.
Markers come in diverse types, each tailored for unique effects, with alcohol-based markers favored for their vibrant colors and blending capabilities.
Water-based markers are great for beginners; they’re easy to control and clean up. They’re less likely to bleed through paper, which is a plus.
If you’re looking for precision, consider fine-tipped markers that help you create detailed work.
Brush markers offer versatility with their flexible tips, allowing you to achieve different line widths.

Don’t forget about gel markers, which provide a unique, glossy finish.
Understanding these types will help you choose the right marker for your shading techniques and enhance your artwork effectively.
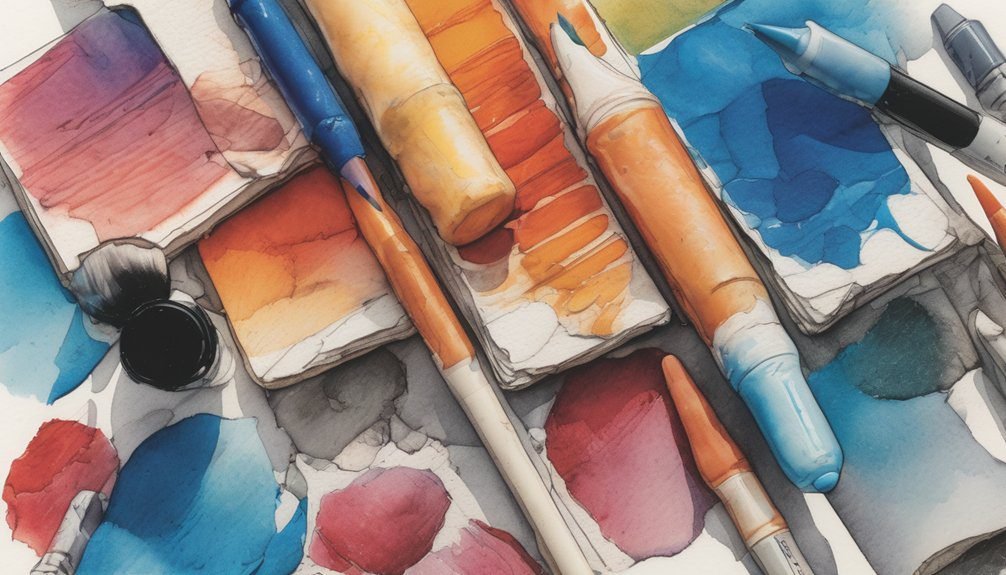
Essential Tools for Shading
To achieve stunning shading with markers, having the right tools is crucial. Start with a set of high-quality markers in various colors and tip sizes. Brush tip markers offer flexibility for blending, while fine tips are great for details.
You’ll also need a blending tool, like a colorless blender or a soft brush, to help smooth transitions between shades. A palette or mixing surface can be handy for combining colors and testing shades before applying them.
Don’t forget quality paper designed for markers; it prevents bleeding and allows for better blending. Lastly, keep a few cotton swabs or paper towels nearby for quick cleanups.
With these essential tools, you’re ready to elevate your shading game!
Basic Shading Techniques
With the right tools in hand, you can start applying basic shading techniques that will bring your artwork to life. Begin by identifying your light source; this helps you determine where shadows will fall. Use hatching for a simple, linear approach, and cross-hatching for deeper shadows. Experiment with stippling to create texture.
Here’s a quick reference table for these techniques:
| Technique | Description | Best For |
|---|---|---|
| Hatching | Parallel lines to create depth | Simple shading |
| Cross-hatching | Intersecting lines for darkness | Complex shading |
| Stippling | Dots to build texture | Detailed areas |
These foundational methods will improve your shading skills and enhance your overall artwork.
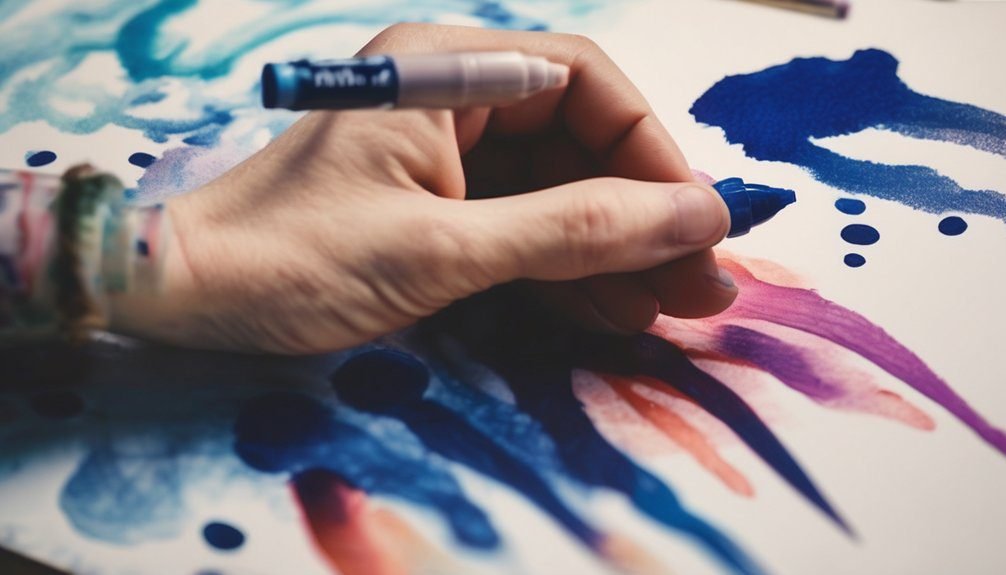
Blending Techniques for Smooth Gradients
While mastering blending techniques can seem daunting, they’re essential for achieving smooth gradients in your marker artwork.
Start by choosing two or more colors that complement each other. Apply the lighter shade first, covering the area you want to blend. Then, use the darker color and lightly layer it over the edge of the lighter shade.
To blend, use a colorless blender or the lighter marker, gently merging the two colors together. You can also try the flicking technique, where you flick the lighter marker into the darker color for a seamless transition.
Remember to work quickly, as markers dry fast. Practicing these techniques will help you create beautiful, smooth gradients that enhance your artwork.
Layering Colors for Depth
Layering colors is a powerful technique that can add incredible depth to your marker artwork.
By carefully applying multiple colors, you can create richer, more dynamic visuals. Here are some tips to get you started:
- Choose a base color: Start with a lighter shade as your foundation.
- Add mid-tones: Gradually incorporate darker colors to build dimension.
- Use complementary colors: Pair colors that enhance each other for striking contrasts.
- Blend lightly: Use a lighter marker over darker layers to soften edges and create a seamless transition.
Experiment with different combinations and techniques to see what works best for your style.
With practice, layering will enhance your artwork and elevate your skills!
Creating Textures With Markers
Creating textures with markers can transform flat illustrations into lively, three-dimensional pieces. To achieve this, start by experimenting with different strokes. For instance, using short, quick strokes can create a rough texture, while long, smooth lines can give a sleek effect.
Layering your colors can also enhance texture; try adding darker shades in specific areas to simulate shadows. You can even use cross-hatching or stippling techniques to suggest depth and detail.
Don’t forget to consider the surface you’re working on; textured paper can amplify your effects. Lastly, practice blending colors to create subtle gradients that mimic natural textures like fur or fabric.
With some creativity, your markers can bring your artwork to life!
Tips for Controlling Marker Flow
Controlling marker flow is essential for achieving precision in your artwork. When you master this skill, you’ll create cleaner lines and smoother transitions.
Here are some tips to help you control the flow of your markers:
- Use light pressure: Applying less pressure helps prevent excessive ink from flooding the paper.
- Practice on scrap paper: Test your markers on scrap paper to understand how they flow and dry.
- Keep the nib clean: Regularly wipe the nib with a tissue to avoid build-up that can affect ink flow.
- Adjust your angle: Tilting the marker can help control the amount of ink released, allowing for more detailed work.
Practicing Shading With Different Subjects
While practicing shading with different subjects, you’ll discover how various forms and textures can influence your technique.
Start with simple shapes like spheres and cubes to grasp the basics of light and shadow. As you gain confidence, move on to more complex subjects, such as plants or animals, where you can explore organic shapes and varying textures.
Pay attention to how light interacts with surfaces; glossy materials reflect more light while matte surfaces absorb it. Experiment with layering colors to create depth and dimension.
Don’t hesitate to try different angles and perspectives, as this can drastically change the way you perceive shading. With consistent practice, you’ll enhance your skills and develop your unique shading style.
Frequently Asked Questions
Can I Use Markers on Watercolor Paper?
Yes, you can use markers on watercolor paper. Just make sure the paper’s absorbency suits your markers. Experiment with different techniques to see how colors blend and interact for vibrant results without too much bleeding.
How Do I Clean My Markers After Use?
You can clean your markers by gently wiping the nibs with a damp cloth. But wait—if you don’t, those vibrant colors might fade. Keep them fresh, and your art will shine bright every time!
What Is the Best Paper for Marker Shading?
The best paper for marker shading is smooth, heavyweight paper designed for markers. It prevents bleeding and allows for vibrant colors. Look for paper labeled for alcohol or water-based markers to achieve the best results.
Can I Mix Different Brands of Markers?
Sure, you can mix different brands of markers! Just ensure their ink types are compatible for the best blend. Experimenting with various brands can lead to vibrant visuals and exciting effects in your artwork!
How Long Do Markers Typically Last?
Markers typically last anywhere from a few months to several years, depending on usage and storage. If you store them properly, you’ll extend their lifespan, ensuring you get the most out of your supplies.
Conclusion
In conclusion, mastering marker shading opens doors to dazzling designs and dynamic depth. By blending bold colors and crafting captivating textures, you’ll elevate your artwork to new heights. Remember, practice makes perfect, so don’t hesitate to play with strokes and styles. Your unique touch will transform simple sketches into stunning masterpieces. So grab those markers, embrace your creativity, and let your imagination shine as you shade your way to success!